How to Change Default Font on Windows 7
How to Change the Default Font on Windows 7
This wikiHow teaches you how to change the appearance of some of your Windows 7 computer's on-screen text. Although you can't change all of Windows 7's fonts, you can alter some of them from within the Personalize menu. Right-click the...
- How to change the default Windows 10 font
- How to set the default font and font size on Excel
Method 1 of 2:
-

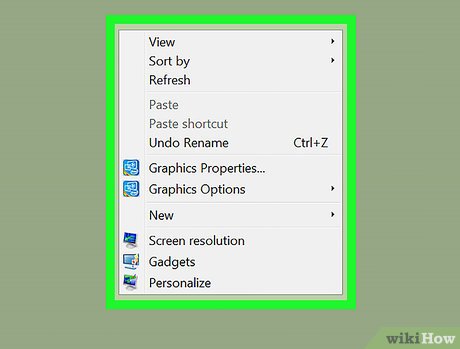
Right-click the desktop. Doing so will invoke a drop-down menu.
- You can minimize all programs to get to the desktop by clicking the rectangular box in the bottom-right corner of the screen.
-

Click Personalize . This option is at the bottom of the drop-down menu.[1]
-

Click a theme. You should see a few square, colored icons in the middle of this page. Clicking one will open its theme page.
- You can also click the theme under "My Themes" near the top of this window to edit a theme you already created.
-

Click Advanced appearance settings . It's near the bottom of the page, just below the "Color intensity" slider.
-

Click the "Items:" box. You'll see this box directly below the "Items:" heading that's underneath the preview window. Clicking this box will invoke a drop-down menu.
- This box will usually say "Desktop" by default.
-
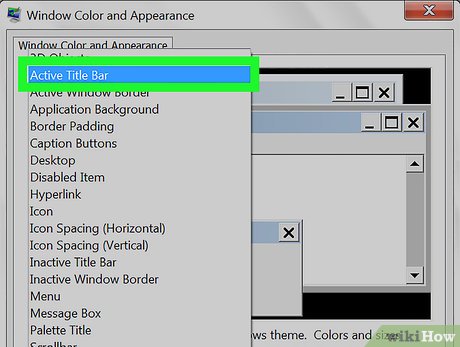
Select an item to customize. You can't change the Desktop font, but you can change the following items:[2]
- Active Titlebar
- Icon
- Inactive Titlebar
- Menu
- Message Box
- Palette Title
- Selected Items
- ToolTip
-

Click the "Font:" box. It's just below the "Items:" box. You'll see a drop-down menu with different font names appear.
- The way the fonts are displayed shows you how their text will appear.
-
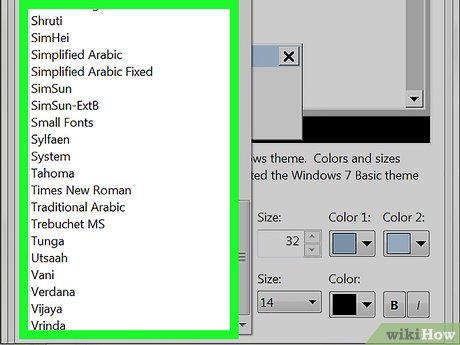
Select a font. Doing so will apply it to your selected item (e.g., Title Bar) in the preview window near the top of the page.
- If you don't like your selected font, try a different one.
- You can also change the font's formatting (e.g., color or size) by clicking the box beneath the respective heading and then clicking an option in the drop-down menu.
- To bold or italicize your font, click B or I respectively. They're right of the font name and size.
-

Change the fonts of different items. While changing the font of every possible item won't make all of your Windows 7 computer's text match, it will apply to most of the menus and items with which you most often interact.
-
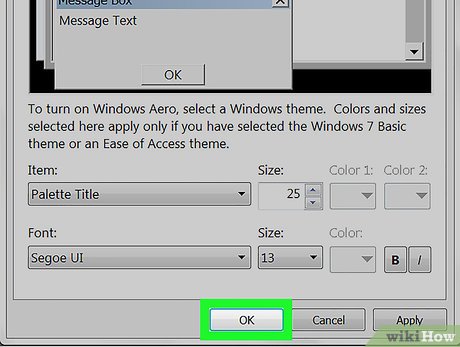
Click Apply , then click OK . These buttons are both at the bottom of the window. Doing so will apply and save your changes.
- You may need to restart your computer in order for these changes to take place.
Method 2 of 2:
Changing Text Size
-
Right-click the desktop. Doing so will invoke a drop-down menu.
- You can minimize all programs to get to the desktop by clicking the rectangular box in the bottom-right corner of the screen.
-
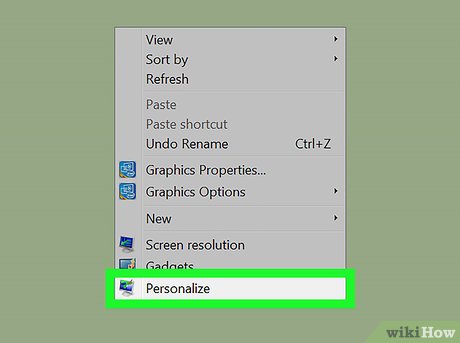
Click Personalize . This option is at the bottom of the drop-down menu.
-
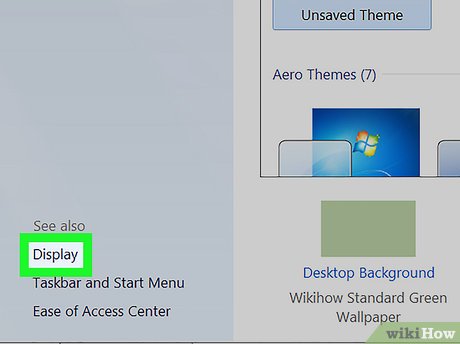
Click Display . You'll see this link under the "See also" heading in the bottom-left area of the Personalize window. You should see on this page the following options:[3]
- Smaller - The default text size.
- Medium - 125 percent of the default text size.
- Larger - 150 percent of the default text size.
-
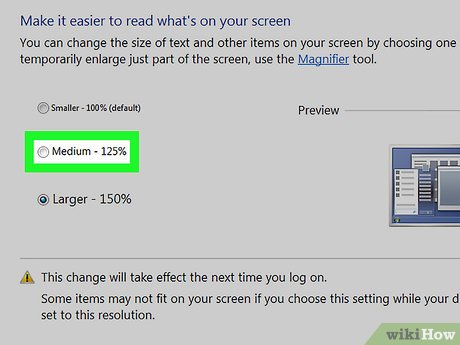
Click the circle to the left of a text size. This will select it as your new text size.
- To set a custom text size, you can click the Set custom text size (DPI) link on the left side of the window, then click the 100% box, select a new scaling percentage, and click OK.
-
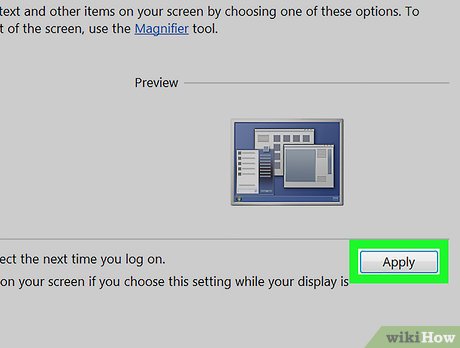
Click Apply . It's at the bottom of the window. Doing so will prompt a pop-up window telling you to log off.
-
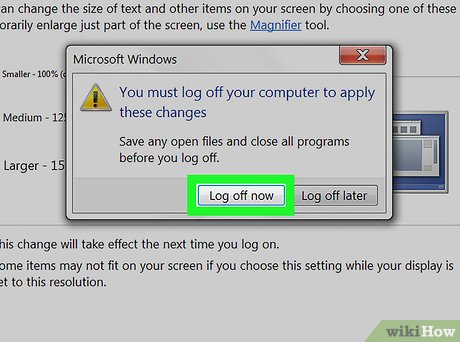
Click Log off now . This will log you out of your computer; in some cases, it may also restart your computer. Once you log back in, your text will be the specified size.
- If you have work open, click Log off later and save your work. You can then restart your computer by opening the Start menu, clicking the arrow right of Shut down, and clicking Restart.
How to Change Default Font on Windows 7
Source: https://tipsmake.com/how-to-change-the-default-font-on-windows-7
0 Response to "How to Change Default Font on Windows 7"
Post a Comment